Wiki
Layout Template
Introduction #
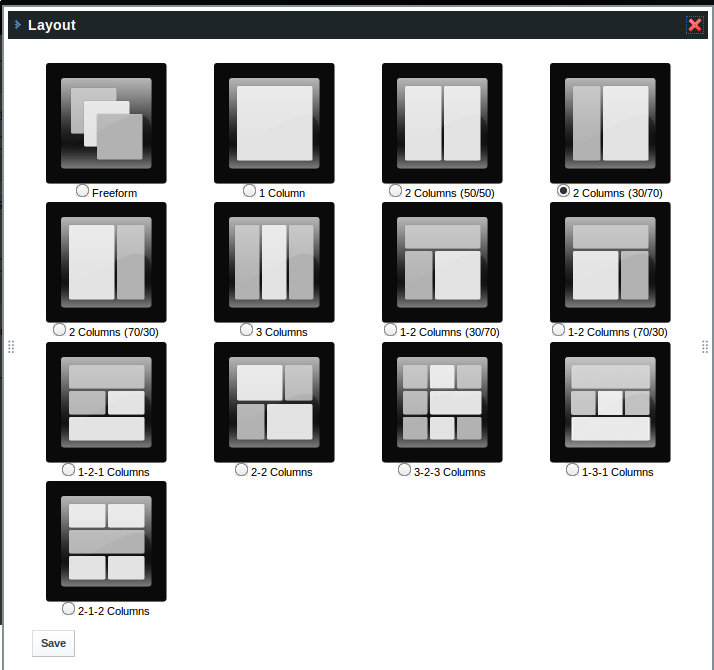
Layout Templates are ways of choosing how your portlets will be arranged on a page. They make up the body of your page, the large area where you drag and drop your portlets to create your pages. Liferay Portal comes with several built-in layout templates, but if you have a complex page layout (especially for your home page), you may wish to create a custom layout template of your own.
Layout Templates are the easiest plugins to create. They comprise only a few files with simple table or CSS-based containers into which portlets can be dropped, as well as a thumbnail image of what the layout looks like. This thumbnail is displayed when the end user clicks Layout Template from the Dock menu.
Creating Layout Templates #
Creation of layout templates is done in a similar manner to the creation of portlets and themes. There is a layouttpl folder inside the plugins SDK where all new layout templates reside. To create a new layout template, you run a command in this folder similar to the one you used to create a new portlet or theme. For Linux and Mac, type:
./create.sh <project name> “<layout template title>”
For example, to create a layout template with a project folder of 3-columns and a theme title of 3 Columns, type:
./create.sh 3-columns “3 Columns”
On Windows, you would type:
create.bat 3-columns “3 Columns”
This command will create a blank layout template in your layouttpl folder.
Anatomy of a Layout Template #
Layout Template projects are very simple. Say, for example, you wanted to create the above 3 Columns layout template, with left and right columns that take up 20% of the available space, and a middle column that takes up 60%. This is a very common site layout and surprisingly, Liferay does not ship with it (though it does have a three evenly-spaced columns template).
To separate our template from the one that ships with Liferay, we'll call it “3 Columns II” as it will be the newer, slicker sequel. After running the above create Ant script, we have a new project with the layout pictured.
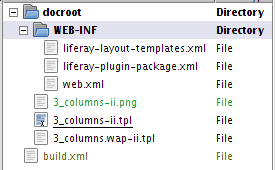
Our next step is to open the 3-columns-ii.tpl file and create our three column template. This file is for regular web browsers to use; Liferay will automatically detect the client being used to connect to the site and serve up the appropriate template. If the client is a phone, it will serve the 3_columns.wap-ii.tpl file.
Open the 3-columns-ii.tpl file in your text editor of choice. You will see that by default, it is a completely blank file. In future versions of the Plugins SDK, there may be a commented out template in there to help you get started. For now, though, we'll provide the code for you to use. Paste the following code into the file:
<div class="columns-3" id="content-wrapper">
	<table class="lfr-grid" id="layout-grid">
	<tr>
		<td class="lfr-column twenty" id="column-1" valign="top">
			$processor.processColumn("column-1")
		</td>
		<td class="lfr-column sixty" id="column-2" valign="top">
			$processor.processColumn("column-2")
		</td>
		<td class="lfr-column twenty" id="column-3" valign="top">
			$processor.processColumn("column-3")
		</td>
	</tr>
	</table>
</div>
You'll note that each table cell has a CSS class associated with it, as well as an ID. These may be customized by modifying the theme you are using to display the layout.
For the WAP version of the file, we'll use simpler syntax:
<table>
<tr>
	<td>
		$processor.processColumn("column-1")
	</td>
	<td>
		$processor.processColumn("column-2")
	</td>
	<td>
		$processor.processColumn("column-3")
	</td>
</tr>
</table>
WAP doesn't have the benefit of CSS, so we will have to settle for three evenly-spaced columns. The other file you need to customize is the 3-columns-ii.png file. The default file in the project is a blank layout template preview. You'll need to customize it in an image manipulation program such as the GIMP (http://www.gimp.org), Adobe Photoshop, or Ulead PhotoImpact.

Since this is a Developer's Guide, we won't go into how to customize the graphic. Suffice it to say that it can be modified to look similar to the example below. This should make it blend in somewhat with the other layout template preview icons.

Once you have customized the icon, all that is left is to deploy the layout template, as the various configuration files have been already generated properly by the Ant scripts in the Plugins SDK.
Development Notes #
A layout template describes how various columns and rows are arranged to display the portlets. Layout templates are located in the deployed servlet's html/layouttpl/standard and html/layouttpl/custom directories as a series of .tpl files. The templates are defined in the source tree at /portal/portal-web/docroot/html/layouttpl/custom. They appear to be Velocity files.
The layout templates that are available to a portal are described (initially) in WEB-INF/liferay-layout-templates.xml (as well as WEB-INF/liferay-layout-templates-ext.xml). These layouts are read in by com.liferay.portal.service.impl.LayoutTemplateLocalUtil (which is called by MainServlet at startup time, or by com.liferay.portal.deploy.HotDeployLayoutTemplateListener if deployed at runtime). Layout definitions are held in in-memory collections of com.liferay.portal.model.LayoutTemplate objects (and not in the database).
Each "layout" (a.k.a. page) has a layout template associated with it. The layout template is stored in the layout-template-id property in a "portlet layout"'s "type settings."
Unconfirmed (but this is how the rest of Liferay works): To add additional templates in the extension environment, create the file in the /ext/ext-web/docroot/html/layouttpl/custom directory, make a new version of /ext/ext-web/docroot/html/WEB-INF/liferay-layout-templates-ext.xml, declare your additions in that file, and re-deploy the extension environment.
The typical structure of .tpl file is
  		<td class="lfr-column" colspan="2" id="column-1" valign="top">
  			$processor.processColumn("column-1")
  		</td>
$processor.processColumn("column-1") creates an area where the portlets could be added. You can create as many of the areas like that as you want.
Unconfirmed: the id of the container element (td or div) for each column should be the column name (in the example above "column-1").
For Liferay 6.0: Required structure of a .tpl file is
<div id="main-content" role="main">
    <div class="portlet-layout">
        <div class="portlet-column" id="column-1">
	    $processor.processColumn("column-1")
	</div>
	<div class="portlet-column" id="column-2">
	    $processor.processColumn("column-2")
	</div>
    </div>
</div>
where "main-content" is pushed aside when install more applications is open, class="portlet-column" is required for defining the part of the page containing a portlet column, and the id must match the column name. The only required part of the layout.tpl is a <div> or <td> with a class="portlet-column"
Another thing to take care about is the WEB-INF/liferay-layout-templates.xml (as well as WEB-INF/liferay-layout-templates-ext.xml). Add something like:
  	<custom>
       ...
  		<layout-template id="1_column" name="1 Column">
  			<template-path>/layouttpl/custom/1_column.tpl</template-path>
  			<wap-template-path>/layouttpl/custom/1_column.wap.tpl</wap-template-path>
  			<thumbnail-path>/layouttpl/custom/1_column.png</thumbnail-path>
  		</layout-template>
       ...
  	</custom>
You can also specify wap layout there.
OR
Create a stand-alone .WAR file that contains the layout definitions, and hot deploy.
For a template, download the latest source and cd to layouttpl/sample-pack-01-layouttpl.war
1. Make some changes to the files
2. Create a war
jar -cvf ../mylayout.war *
3. Copy war file to your deploy directory.
Available variables in template #
| Variable | Type | Description | |
|---|---|---|---|
| processor | com.liferay.portlet.layoutconfiguration.util.velocity.TemplateProcessor | $processor.processColumn("column-1") | |
| request | javax.servlet.http.HttpServletRequest | ||
| pageContext | javax.servlet.jsp.PageContext | ||
| portletConfig | com.liferay.portlet.PortletConfigImpl | ||
| renderRequest | javax.portlet.RenderRequest | ||
| renderResponse | javax.portlet.RenderResponse | ||
| themeDisplay | com.liferay.portal.theme.ThemeDisplay | Javadoc 5.2 | |
| company | com.liferay.portal.model.Company | ||
| user | com.liferay.portal.model.User | Javadoc 5.2 | |
| realUser | com.liferay.portal.model.User | ||
| layout | com.liferay.portal.model.Layout | Javadoc 5.2 | |
| layouts | java.util.List<???> | ||
| plid | java.lang.Long | ||
| layoutTypePortlet | com.liferay.portal.model.LayoutTypePortlet | Javadoc 5.2 | |
| portletGroupId | java.lang.Long | ||
| locale | java.util.Locale | ||
| timeZone | java.util.TimeZone | ||
| theme | com.liferay.taglib.util.VelocityTaglib | ||
| colorScheme | com.liferay.portal.model.ColorScheme | ||
| portletDisplay | com.liferay.portal.theme.PortletDisplay |
Related Articles #
